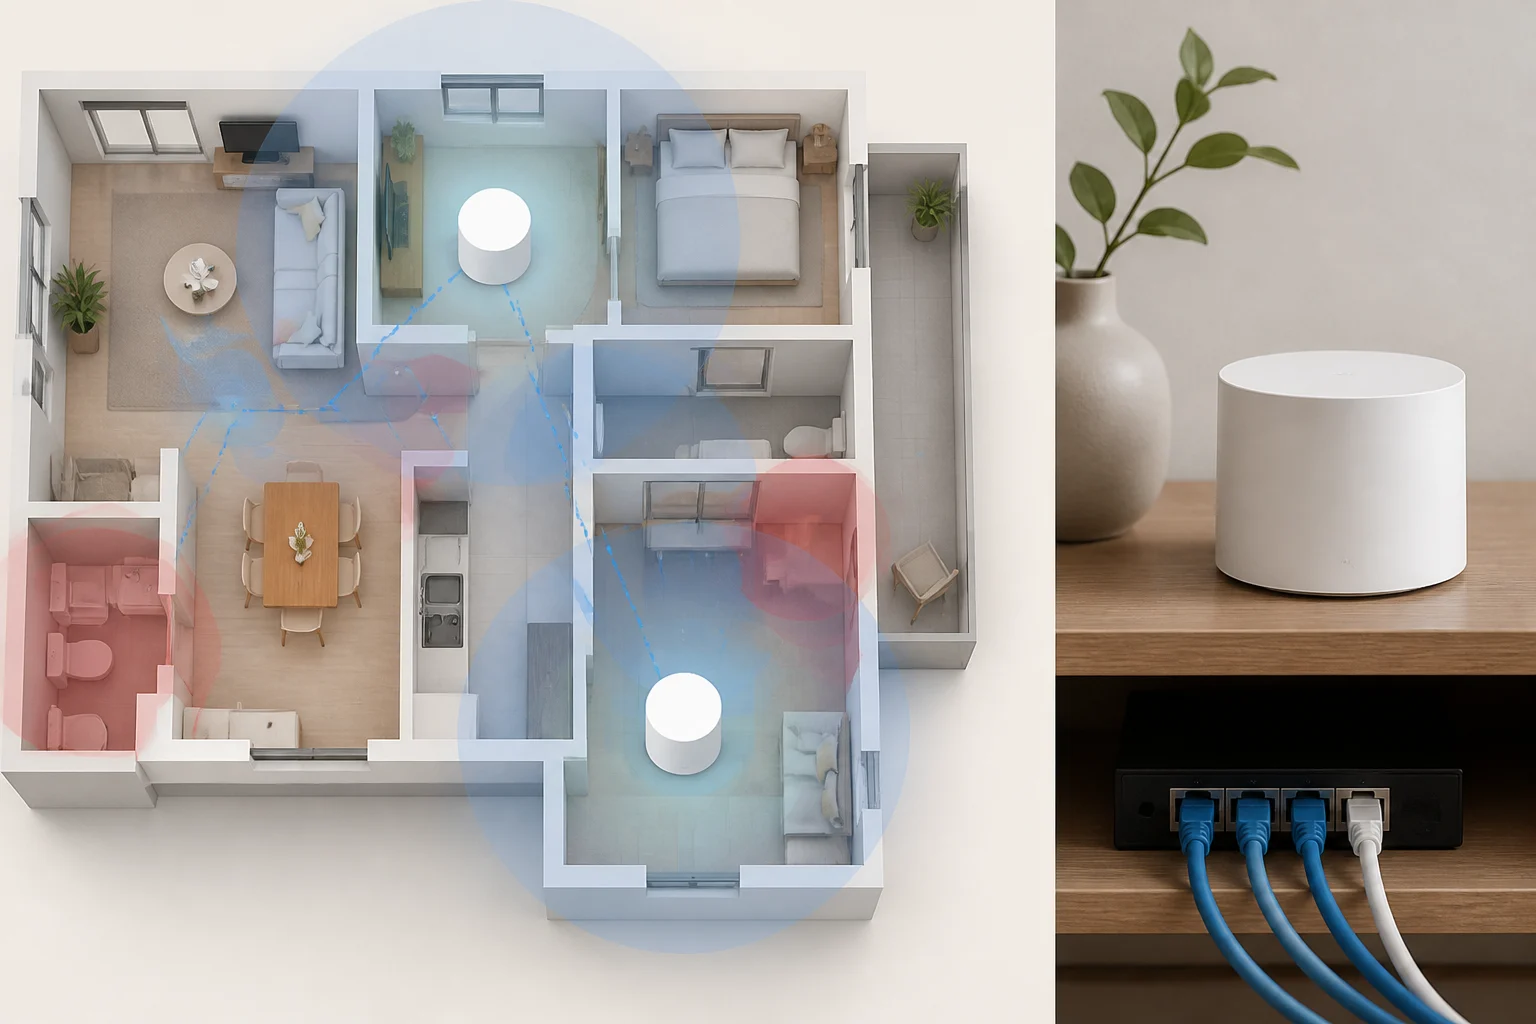
Speed versus stability: why “more megabits” won’t fix an unstable Wi‑Fi
In a typical home, the quality of experience depends more on coverage and interference control than on your plan’s nominal speed. The advertised “up to X Mbps” figure reflects throughput at the provider’s edge, not what a phone receives in a room two walls away. In wireless networks, physical factors like wall attenuation, distance, and channel overlap reduce effective rate and connection consistency even with a fast plan. Put differently: a high‑speed subscription can yield poor results if the radio environment doesn’t cooperate.
Modern home networks adopt self‑regulating mechanisms (for example, mesh systems with automatic channel management and roaming) to improve stability as you move around the house. However, these systems do not replace sound physical design: placement and backhaul still decide the outcome. The wireless layer shares the air with neighbors and with your own devices; when there are too many contenders, the network becomes erratic even if the tariff promises higher throughput. Before ordering more speed, verify whether instability comes from the provider or from your internal network. Comparing wired tests next to the router with Wi‑Fi measurements in problem areas helps isolate the cause and prevents investments that don’t resolve the main symptom.
Placement and interference: gain dB without buying hardware
Placing the access point in a central, elevated position, away from dense obstacles and sources of electromagnetic noise, often improves signal‑to‑noise ratio significantly. A small relocation can translate into several dB of gain—enough to stabilize connections that previously fluctuated. Appliances like microwaves and concurrent 2.4 GHz technologies (Bluetooth, Zigbee) share or sit adjacent in spectrum and can degrade Wi‑Fi if very close to the router or if it operates on saturated channels. Materials such as reinforced concrete, large mirrors, or metal cabinets also influence propagation by reflecting or absorbing part of the signal, creating dead zones.
In urban environments, congestion from neighboring networks is common. A basic adjustment is to physically separate the router from devices that emit in the same bands and to minimize its proximity to metallic surfaces. If there are speakers, thermostats, or smart‑home hubs on Wi‑Fi near the router, relocating or cabling what you can reduces aggregate noise. Whenever possible, keep the router unobstructed, with antennas free and not stacked with other equipment. Spectrum analysis tools and network scanners help visualize which channels and bands are least busy before making changes: you’ll see network density, received signal strengths, and channel occupancy, which informs simple decisions like moving the router a meter, rotating antennas, or changing mounting height.
Bands and channels: when to use 2.4, 5, or 6 GHz and how to set them
The 2.4 GHz band offers greater reach but is more prone to interference and congestion; 5 GHz improves capacity and stability in dense environments at the cost of less penetration; 6 GHz (Wi‑Fi 6E/7) adds wide, lightly used channels that reduce overlap. In 2.4 GHz, using non‑overlapping channels (1, 6, and 11 in most regions) is a coexistence principle that limits co‑channel and adjacent interference. Keeping channel width to 20 MHz on 2.4 GHz reduces mutual stomping among nearby networks and typically delivers more consistent results than trying to squeeze out higher theoretical width.
In mesh networks, dynamic channel selection and load‑balancing across nodes aim to maintain quality as devices move, but they cannot fully compensate for a poorly chosen channel or a saturated band. Manually adjusting channel width (for example, 20 MHz on 2.4 GHz and 40/80 MHz on 5 GHz depending on the environment) and assigning demanding devices to 5/6 GHz can stabilize video calls and streaming more effectively than upgrading your plan. Additionally, separating SSIDs by band or using conservative band‑steering helps ensure capable devices do not cling to 2.4 GHz. If you have 6 GHz, remember its shorter range: use it for rooms near the access point and keep 5 GHz as the general workhorse for adjacent floors or rooms.
Cabling and access points: build a solid backhaul first
For fixed stations (desktop PCs, consoles, TVs, set‑top boxes), an Ethernet link eliminates radio‑medium variability and frees air time for devices that truly depend on Wi‑Fi. A single cable to a small switch in the living‑room cabinet can stabilize TV, consoles, and players simultaneously, and it prevents drops when someone walks around the house with a phone or tablet. If coverage is insufficient in distant rooms, adding wired access points or a mesh system with wired backhaul is preferable to wirelessly repeating signals, because it avoids bottlenecks and retransmission losses. A dedicated link between nodes keeps latency steadier and reduces the likelihood of micro‑outages during handoffs between points.
If pulling cable isn’t viable, consider alternative backhaul technologies (MoCA over existing coax or quality Ethernet‑over‑Power adapters) to feed a secondary access point with stable latency and throughput. In that scenario, spend a few minutes placing each adapter correctly, use direct wall outlets, and avoid surge‑protected power strips that can degrade the signal. In any case, it is more effective to stabilize internal transport before increasing your subscribed speed: an internal network that cannot sustain today’s throughput won’t benefit from extra megabits. A practical approach is to prioritize the wired skeleton and only then fine‑tune Wi‑Fi, knowing the backhaul is not the bottleneck.
Step‑by‑step diagnostics: separate provider from internal network
- Step 1: test over cable. Connect a computer via Ethernet directly to the ISP router and run multiple tests at different times of day. If instability already shows here, it may point to the provider connection or external congestion. Be sure to disable other downloads or backups during testing, and repeat several times to obtain a reliable average.
- Step 2: test Wi‑Fi next to the router. Compare with wired figures; a sharp drop without obstacles suggests suboptimal radio configuration or nearby interference. This measurement rules out distance loss and indicates the health of the primary wireless interface.
- Step 3: measure in problem spots. Record band, channel, signal strength (RSSI), and quality (SNR) with an analyzer app. If signal is strong but performance is poor, the issue may be interference or channel saturation. If signal is weak, relocate the AP or add another access point. Document results with screenshots or notes and keep conditions constant (same time, same device) so comparisons are meaningful. - Step 4: tune bands and channels. On 2.4 GHz, try 1/6/11 at 20 MHz; on 5/6 GHz, evaluate less‑crowded channels and moderate widths. Repeat measurements. Change only one variable at a time (channel, width, transmit power) to attribute improvements or regressions clearly, and wait a few minutes after each change for clients to renegotiate. - Step 5: wire the critical gear. Prioritize Ethernet for fixed devices and, if you use mesh, enable wired backhaul. This reduces air traffic and improves overall consistency, even for devices that remain on Wi‑Fi. - Step 6: validate in real scenarios. Re‑try video calls and streaming where they used to fail; if issues persist only on Wi‑Fi while wired tests are stable, consider adding an AP or optimizing placement before upgrading your plan. Also validate uploads (cloud backups) and latency (gaming or calls) to confirm the improvement isn’t limited to download peaks.
Tools and limits: what to expect—and not expect—from your hardware
Wi‑Fi scanning apps make it easy to identify neighboring networks, signal strength, and channels in use; combined with spectrum analysis, they help detect non‑Wi‑Fi interference (for example, microwaves or Bluetooth devices). Many current routers and mesh systems integrate self‑healing, automatic channel selection, and roaming functions—useful for homes with many devices and mobility. Also leverage client association reports and band data: if most capable devices are stuck on 2.4 GHz despite good 5 GHz coverage, review band‑steering or split SSIDs to direct them appropriately.
Even with modern hardware, there are physical limits: too many walls, floors, or metal structures require adding well‑placed access points. IoT devices that operate only at 2.4 GHz may constrain configuration, and some older clients handle wide channels or newer features poorly. Therefore, balance compatibility and stability, and understand that fine‑tuning is iterative: measure, change one variable, measure again. In multi‑story homes, assume a single router probably won’t suffice; distributing access points and ensuring their backhaul is the most direct path to a predictable network. Likewise, remember transmit power isn’t a magic fix: raising it too much can create asymmetries (they hear you, but you don’t hear them) and more neighbor interference, which worsens exactly what you’re trying to fix.